How to get rid of glare in photopea?
October 26, 2022Hello Friends 👋,
Welcome To aGuidehub! ❤️
To get rid of glare in photopea, select the clone tool and click on the glare many times. It will get rid of glare.
Today, I am going to show you how I get rid of glare in photopea.
Table of contents
- Insert image.
- Create the new layer.
- Select the clone tool.
- Select the magic wand.
Let’s start with the first step.
Step 1: Insert image.
Open the photopea and Select photo, it will open a file browser or download folder you can select the image. And click the open button.
Step 2: Create the new layer.
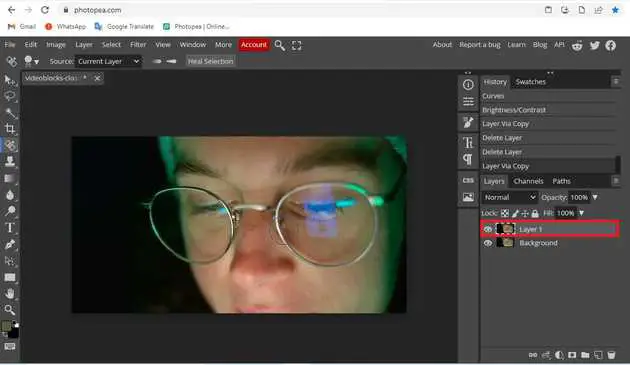
Normally, Photopea would just go ahead and add the new blank layer. But by holding down the Alt / Option key while clicking the New Layer icon. If we look again in our Layers panel, we see that we now have a new blank layer named rid Wrinkles.
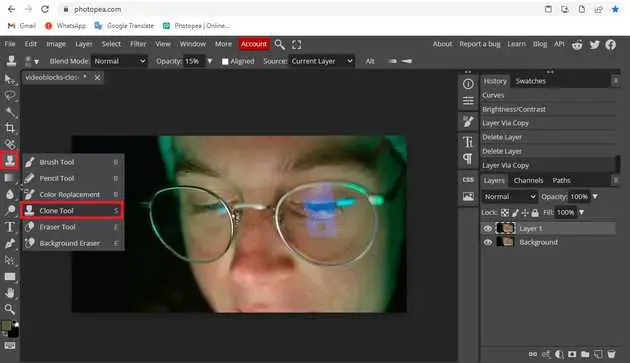
Step 3: Select the clone tool.
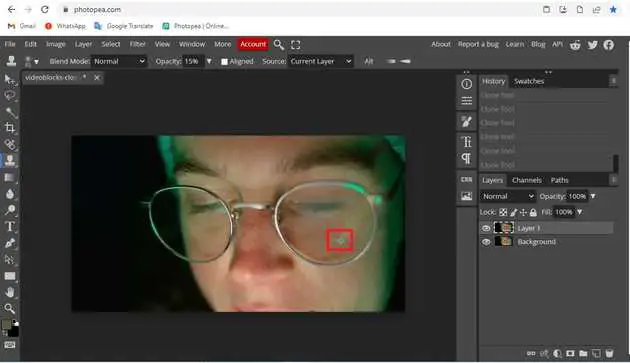
Select the clone tool from the toolbar on the left side of your workspace.
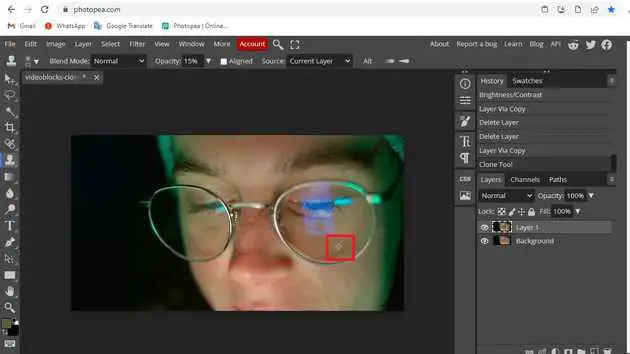
Press Alt + Left mouse key. Left mouse over the area you want to clone. Notice my picture. The area I want to clone will show a plus sign (+).
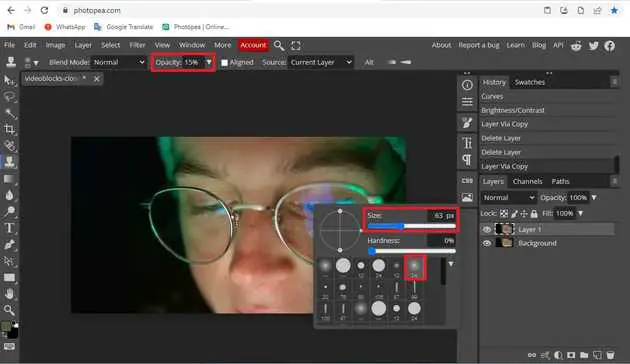
Using the Clone Tool in Photospea Online. Please right-click the mouse. After some time a parameter table will appear. I’ll set the size to 15% then ok.
Then, release the Atl key! and then left-click on the area you want to delete (reflective area). Just like that until your photo is perfect.
Step 4: Select the magic wand.
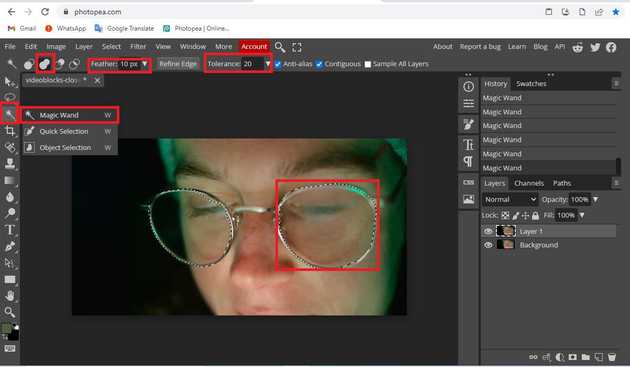
Select the magic-wand from the toolbar on the left side of your workspace. Separate the left and right eye with the Magic Wand tool in photoshop online to separate objects.
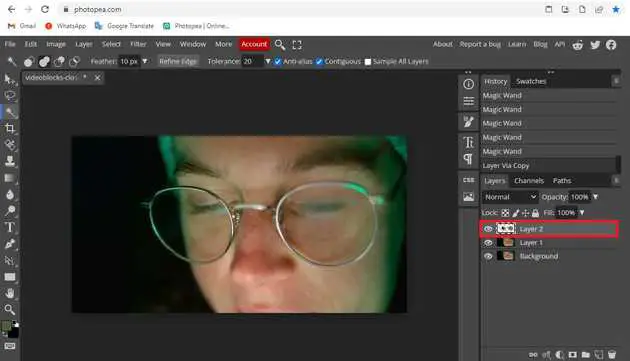
Normally, Photopea would just go ahead and add the new blank layer. But by holding down the Alt / Option key while clicking the New Layer icon. If we look again at our Layers panel.
Final result.
When you follow the above steps then it will get rid of glare in photopea.
All the best 👍

