How to resize an image in photopea?
October 25, 2022Hello Friends 👋,
Welcome To aGuidehub! ❤️
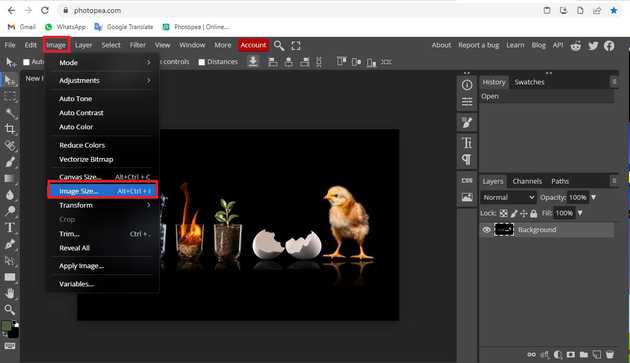
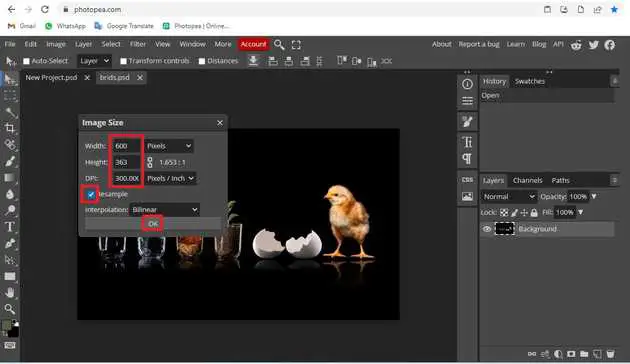
To resize an image in photopea, Select image and hit on image size and it will open a dialog box then set width or height of the image and click on the ok button. It will resize the image.
Today, I am going to show you how I resize images in photopea.
Table of contents
- New page.
- Insert image.
- Select the image size.
- Go to select.
Let’s start with the first step.
Step 1: New page.
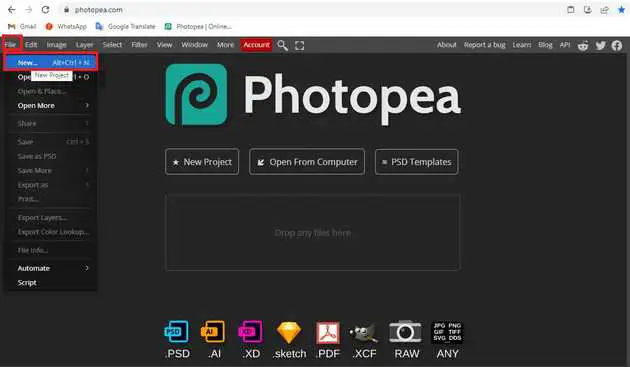
Go to Photopea.com to start a free online photo editor. And create a new page.
Type the desired width and height in the appropriate fields and click on create to make a white layer.
Step 2: Insert image.
Open the photopea and Select photo, it will open a file browser or download folder you can select the image. And click the open button.
Step 3: Select the image size.
Select image and hit on image size to see the modification options. Depending on your needs, you will either adjust the width or height of the image.
Click the keep aspect ratio to make the desired changes. Depending on your needs, you will either adjust the width or height of the image. Click ok.
Step 4: Go to select.
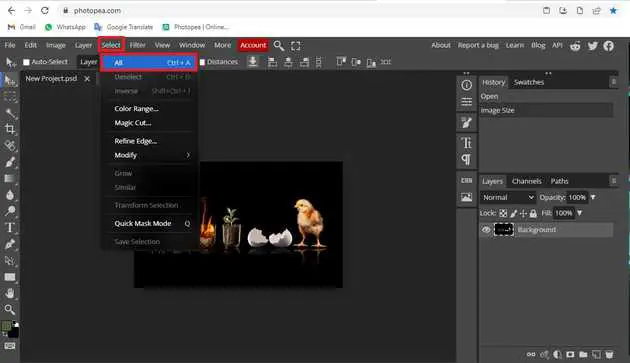
Go to the top of the menu bar and click on select -> and choose all to select the photo.
Go to the top of the menu bar and click on edit and click on copy.
Return to the white layer, select edit and press paste to combine the image with the transparent layer.
Final result.
When you follow the above steps then it will resize an image in photopea.
All the best 👍


