How to use green screen in photopea ?
October 28, 2022Hello Friends 👋,
Welcome To aGuidehub! ❤️
To use the green screen in photopea, First selects the two images on one page, go to the menu bar click on select, and choose color range. It will use a green screen.
Today, I am going to show you how I use green screen in photopea.
Table of contents
- Insert image.
- Go to the select -> color range.
- Go to select.
- Go to the edit.
Let’s start with the first step.
Step 1: Insert image.
Open the photopea and Select photo, it will open a file browser or download folder you can select the image. And click the open button.
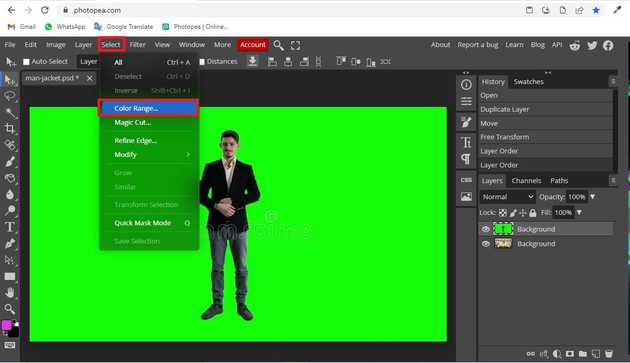
Step 3: Go to the select -> color range.
Go to the top of the menu bar and click on Select and choose color range.
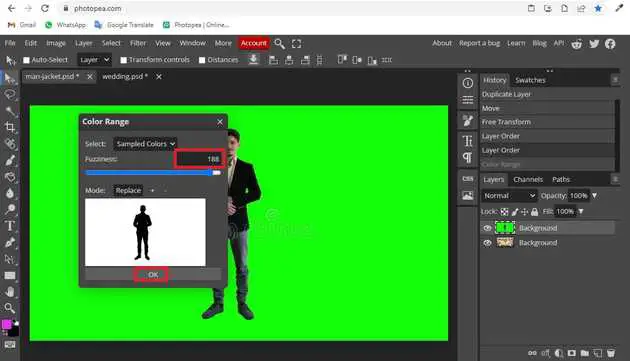
when choosing the color range it will open a dialog box and set the fuzziness to 188 then click on the ok button.
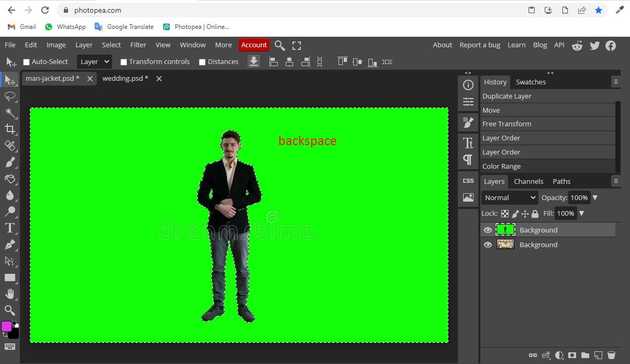
Press the backspace button and delete the green background.
you can see here change in the background.
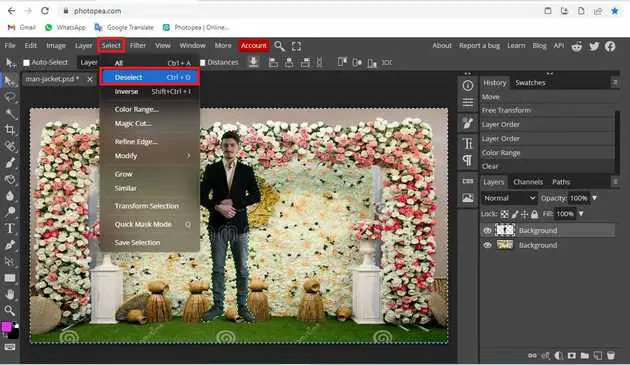
Step 3: Go to select.
Go to the top of the menu bar and click on Select and choose deselect.
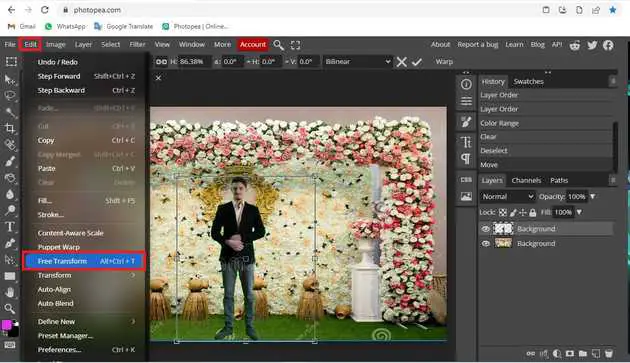
Step 4: Go to the edit.
Go to the top of the menu bar and click on edit and choose ree-transform.
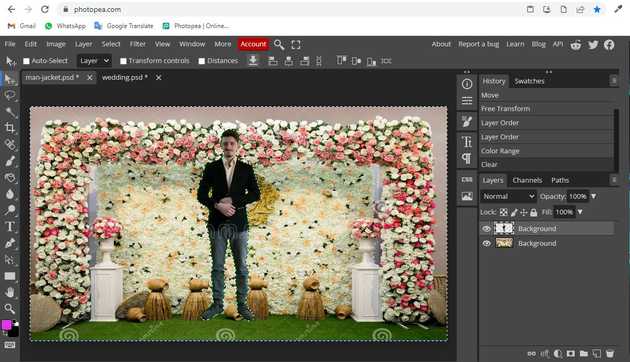
Final result.
When you follow the above steps then it will use green screen in photopea.
All the best 👍


