How to use magnetic lasso tool in photopea?
November 03, 2022Hello Friends 👋,
Welcome To aGuidehub! ❤️
To use magnetic lasso tool in photopea, Select the magnetic lasso tool and click on image and select area, go up and click on refine edge and open a dialog box and your background delete then click on the ok button. It will use magnetic lasso tool.
The Magnetic Lasso Tool is without a doubt one of the best selection tools we have to work with in Photopea, giving us much better results than we could get with the standard Lasso Tool in less time and with less effort and frustration.
Today, I am going to show you how I use magnetic lasso tool in photopea.
Table of contents
- Insert image.
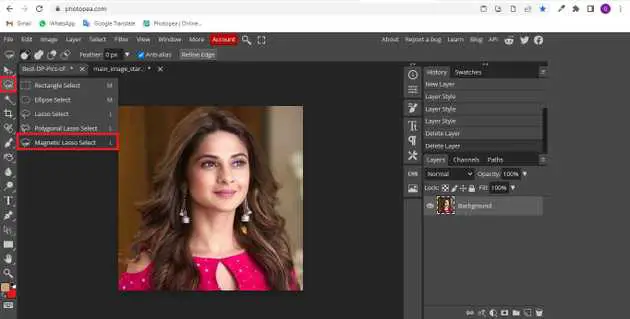
- Select the magnetic lasso tool.
- Go to Edit, then choose Fill.
Let’s start with the first step.
Step 1: Insert image.
Open the photopea and Select photo, it will open a file browser or download folder you can select the image. And click the open button.
Step 2: Select the magnetic lasso tool.
Select the magnetic lasso tool from the toolbar on the left side of your workspace.
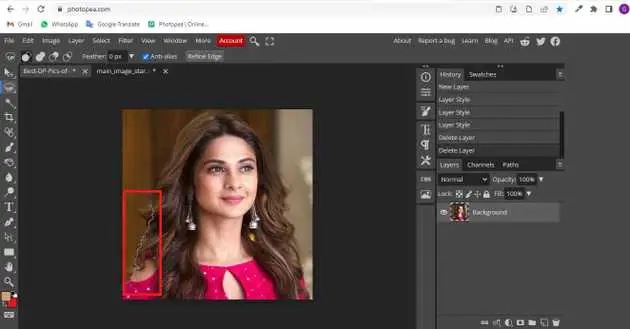
If an anchor point gets added in the wrong spot, either by you or by Photopea, press the backspace key on your keyboard to remove the last anchor point that was added. If you continue pressing backspace, you’ll remove additional points in the reverse order they were added.
And with that, the image is selected:
Step 3: Click on refine edge.
Select the quick selection, go up and click on refine edge and open a dialog box and your background delete then click on the ok button.
Step 4: Insert background image.
Open the photopea and Select the background image, it will open a file browser or download folder you can select the background image. And click the open button.
I can press the letter v on my keyboard to quickly select Photopea’s Move Tool, then I’ll click on the girl image and drag it into a second image I have open to give it a different background
When you follow the above steps then it will use magnetic lasso tool in photopea.
All the best 👍


